A $25 DIY DESIGN PROJECT
My "What's YOUR Thursday" post on vertical organizing really got my creative juices flowing.
So...
This week I decided to share the results of my
decorative mastermind craft project.
This was created on a small scale for my daughters dorm room
for the purpose of filling wall space and decorating on the cheap.
But, can be easily modified
to work as a clipboard for your office space.
This project took a total of 2-3 hours, start to finish!
I hope you like it!
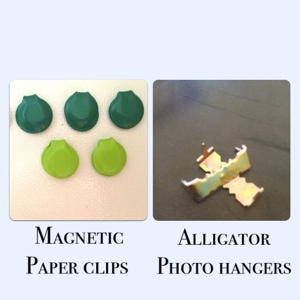
Here's what you will need:
I purchased the Magnetic clips at Target
The Alligator photo hangers are from Walmart
The Paints were purchased at Walmart,
we chose gradient citrus hues to create an ombre effect.
Of course, you can choose any colors you like!
Decorative Paper Tablet: Purchased at Walmart
Craft Bond glue dots: purchased at Walmart.
Purchase little boards in the craft section at Walmart (.97 each),
decide on how many you will need for your project.
This project required 13
*tip: lay out your pattern in the store, then snap a picture of it with
your camera phone for easy reference when you get home.
Step 1
remove the staples from the boards,
flip them over and hammer the alligator clip hangers into place.
Prepare front side to be painted.
Paint them in the colors you selected.
Step 2
After the paint has dried,
apply 2 glue dots to the magnetic paper clip,
press into place on the board.
Step 3
Cut the pretty paper pieces to fit the selected boards
and attach them between the magnetic clips.
*tip: To keep the design aesthetic, don't place decorative paper on every board.
(I chose to place stickers on some and paper on others, leaving a couple plain)
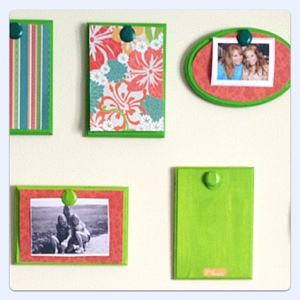
Step 4
Hang your beautiful boards, attach photos, enjoy!
*tip: I found this great tip on how to hang the perfect picture on pinterest,
I tried it and it was a huge help in keeping them all straight as well as
keeping me from creating a bazillion holes in the wall.
Want to see the tip? click Here
Since this art project was hung in the
common area of her dorm,
we hung a few of my daughter's favorite photo's,
leaving room for her roommates to do the same.
I sure had fun working on this project with my daughter.
I hope it inspires you to do the same.
What do you think?